
Our Process · Ontario & Quebec
What to Expect During an Air Quality Inspection
From the first phone call to your report, here’s exactly how our certified inspectors work. No mystery, no upsell theatre, just the process.
15,000+ inspections since 2005
IICRC & IAQA certified
Same-day reporting
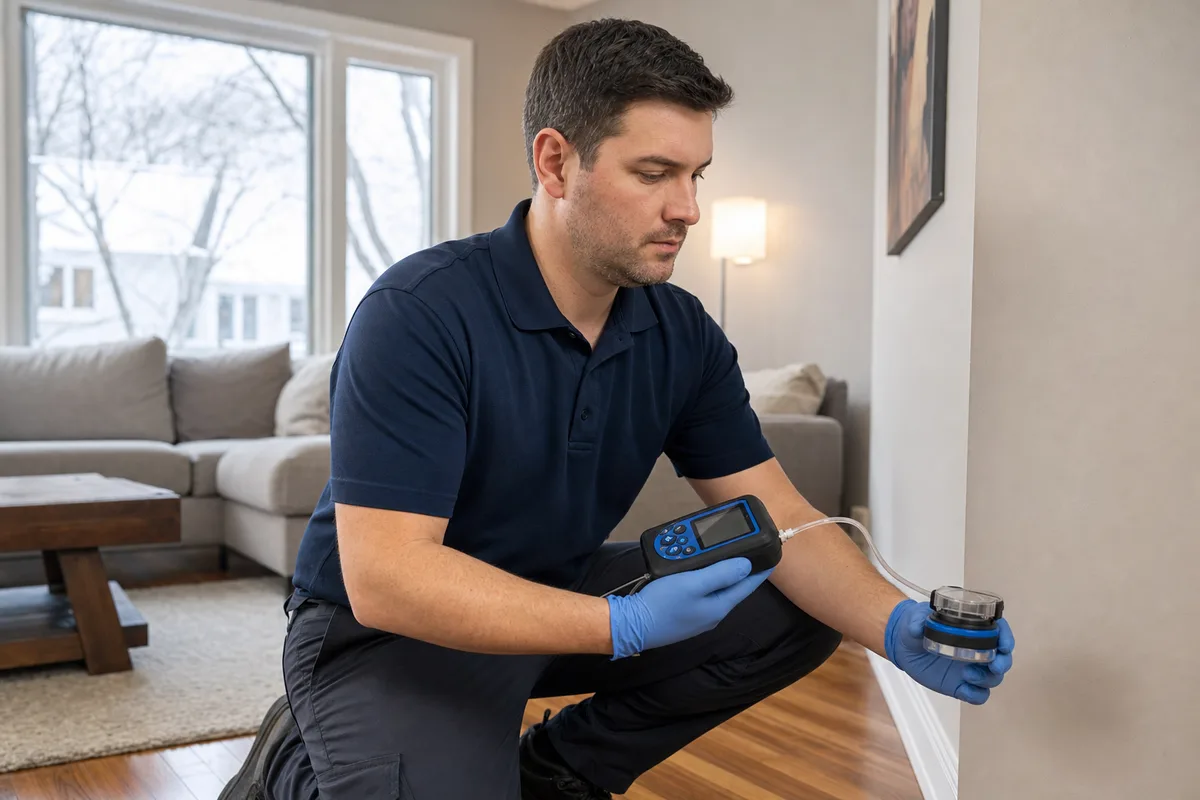
Most people call us because something feels off. A musty smell in the basement that won’t quit, a spot on the ceiling that keeps coming back, a new baby and a house built in the 1970s. Whatever brought you here, the question underneath is almost always the same one: what actually happens when an inspector shows up? Fair question, and one nobody seems to answer straight. So here’s the whole thing, start to finish, the way we run it after 15,000-plus inspections across Ontario and Quebec.
Step 1: How Does Booking an Air Quality Inspection Work?
Booking starts with a short conversation, not a form robot. When you call us at 1-866-528-2897 (we answer Monday to Friday, 8:00 AM to 3:00 PM), an inspector asks a handful of questions: what you’re noticing, where in the home, how long it’s been going on, and whether anyone’s had symptoms like a stuffy nose or a cough that clears up when they leave the house.
That five-minute chat does real work. It tells us whether you likely need residential air quality testing, a commercial assessment, or a focused mold test. It also lets us bring the right equipment the first time, so we’re not booking a second visit you didn’t ask for. We’ll confirm a date, a time window, and roughly how long we’ll be on site. That’s it. You’re scheduled.
Before you call: jot down when you first noticed the problem and where the water or smell seems to come from. A five-word note like “dishwasher leaked, March, kitchen wall” saves us real time on site.
Step 2: How Should You Prepare Your Home Before the Inspection?
Honestly, not much. The best preparation is to leave things mostly as they are, because we want to measure your normal air, not a cleaned-up version of it. Don’t scrub the mouldy corner the day before. Don’t run every window open for three hours to “freshen up.” You’d be erasing the exact thing we came to find.
A few small things do help, though:
Clear a path
Make sure we can reach problem areas like the basement, crawlspace, or that closet under the stairs.
Settle the pets
Keep cats and dogs in one room during sampling so they don’t skew the readings or get underfoot.
Note past water
Had a leak or a flood? Write down roughly when it happened and where the water went.
Keep it closed up
Shut doors and windows for about an hour before we arrive so indoor readings settle into a stable baseline.
Step 3: What Happens During the On-Site Walkthrough?
The walkthrough is a room-by-room visual and moisture assessment, and it’s where most of the answers actually come from. Sampling gets the headlines, but a trained set of eyes finds the story first. We start where you flagged trouble, then work through the rest of the home, because problems rarely stay in one room.
We’re reading the building. A 4-inch water stain along a baseboard, a bubble in the paint, the faint tide line behind a toilet, condensation on a window frame in January. We use moisture meters on suspect walls and check the humidity, since anything sitting above about 60% relative humidity is a mould buffet. We look at your HVAC returns, bathroom fans, and the usual hidden spots: behind furniture on exterior walls, under sinks, around the water heater.
A word on older homes: we also watch for materials that might contain asbestos, which you can’t identify by sight and should never disturb yourself. If there’s a persistent odour, we trace it to its source instead of masking it.
Step 4: How Is the Air Actually Sampled and Tested?
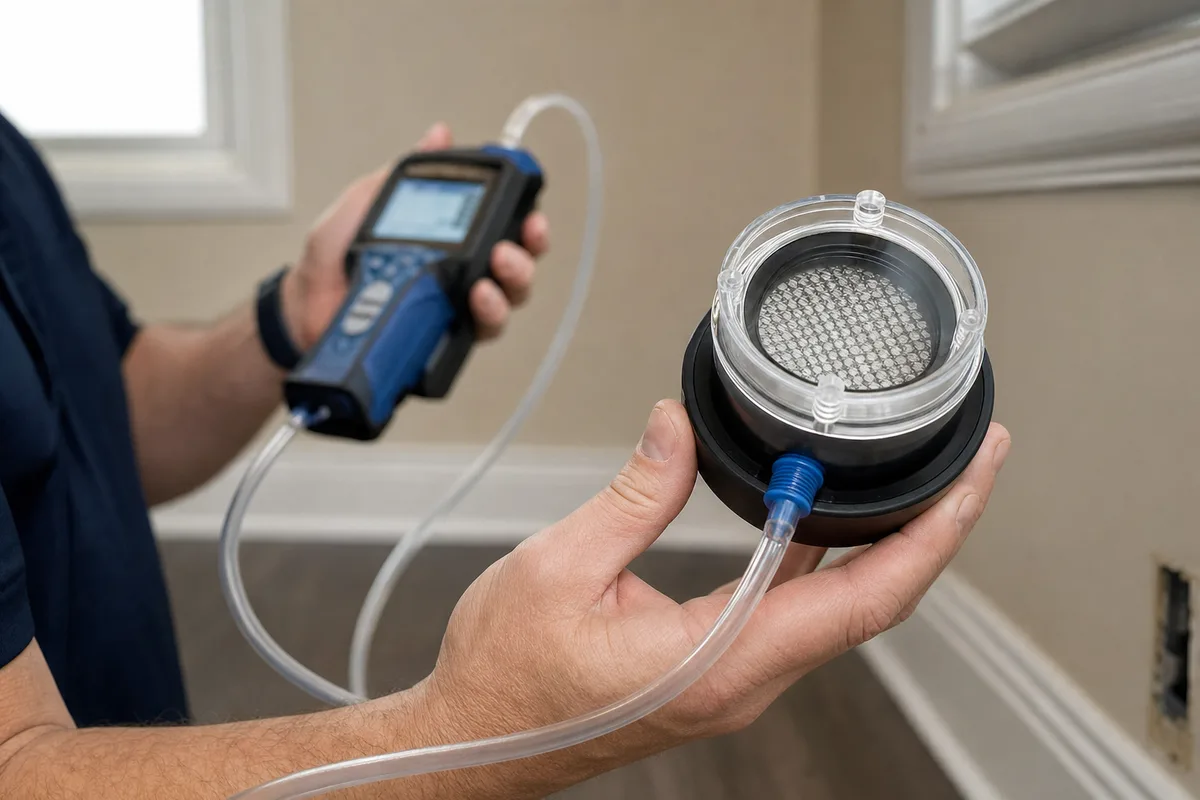
We collect air and surface samples, then send them to an accredited lab for analysis. For air sampling, a calibrated pump pulls a measured volume of air through a spore trap cassette, usually one sample per problem area plus an outdoor control. That outdoor sample matters more than people realize, because indoor mould results only mean something when you compare them against what’s floating outside that same day.
For surfaces, we use a swab or a tape lift on visible growth to confirm what it is. Suspected asbestos materials get a small, carefully collected bulk sample handled under proper protocol. Everything is labelled, logged with a chain of custody, and packaged for the lab. We’re not guessing at species or fibre types in your living room, and you should be skeptical of anyone who claims they can read a spore count off a handheld gadget on the spot. Real numbers come from a microscope, not a dashboard.
Which Air Sampling Methods Do We Actually Use?
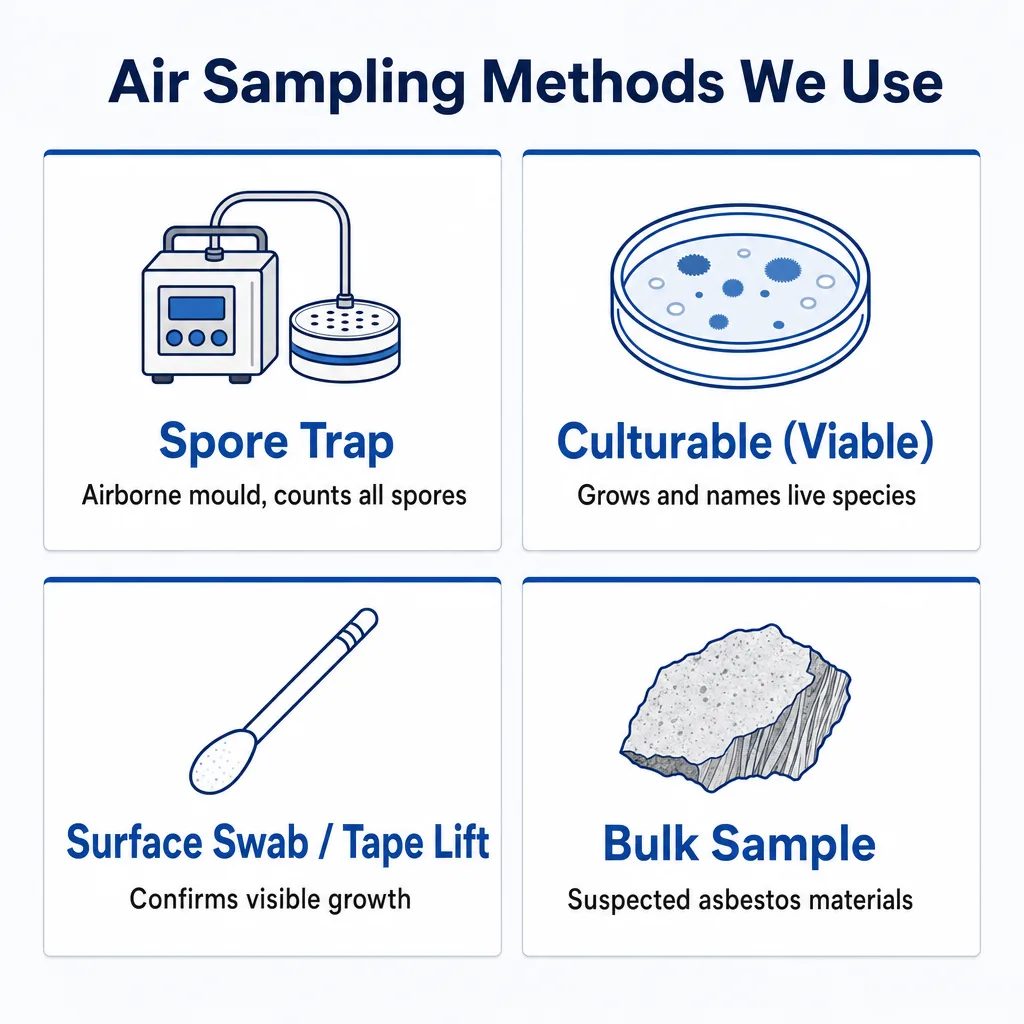
There’s no single “air test.” We match the sampling method to what we’re chasing, because a mould question and an asbestos question and a lingering-odour question don’t get answered by the same tool. (If a smell is what brought you here, our odour inspection service walks through how we trace one to its source.) The spore trap you saw in the last step is the workhorse for airborne mould, but it’s one of several methods, and picking the wrong one gives you a clean-looking result that missed the actual problem.
Here’s what we reach for, and when:
Spore trap air sampling
A calibrated pump draws a set volume of air across a sticky slide inside a cassette (often an Air-O-Cell or similar). The lab counts spores under a microscope. It catches the dead, non-viable spores a culture would miss.
Culturable (viable) sampling
Air is impacted onto a growth plate so the lab can grow and identify living organisms to the species level. We use it when you need to know exactly which mould is present, not just how much.
Surface sampling
A swab or tape lift pressed onto visible growth to confirm what that black patch really is. A stain isn’t proof. The lab result is.
Bulk sampling
A small physical piece of the material itself, the method for suspected asbestos in drywall, tile, or old insulation, always collected under proper containment.
What about the walk-through readings? During a visit we also note ambient conditions like humidity, carbon dioxide, and fine particulate, which help us read the room’s overall state. Those inform the picture. They aren’t a substitute for lab-analysed samples, and we won’t pretend a handheld number is a diagnosis.
What Standards and Lab Analysis Stand Behind Your Results?
Your results only mean something because of what happens after the sample leaves your home: an accredited lab analyses it, and the whole job follows recognized industry standards. That’s the real line between a professional test and a hardware-store kit. The kit gives you a colour. We give you a defensible number tied to a method someone can check.
On the lab side, mould air samples come back as spores per cubic metre, and viable samples as colony-forming units per cubic metre (CFU/m3). Neither figure means much on its own. The reading only makes sense next to the outdoor control taken the same day, because outdoor air sets the baseline your indoor air is measured against. When the indoor count materially exceeds outdoor, and the species mix indoors looks different, that’s when we flag it. Direct microscopy gives a fast total count. Culturing takes longer but names the organism. We pick based on your question, and the report says which we did.
The standards side is where our certifications stop being letters after a name and start doing work. Our inspectors hold IICRC and IAQA credentials, and we follow the consensus documents the industry actually runs on, including the IICRC S520 standard for mould assessment and recognized ASTM sampling methods for airborne and surface work. Standards are why two of our inspectors, in two different homes, collect a sample the same way and a lab can trust it. If you want to see who’s doing the work and what backs it, our certified inspectors and their qualifications are listed in plain sight, and you can read more about why professional air quality testing pays off over a DIY guess.
The short version: right method, accredited lab, same-day outdoor control, recognized standard. Pull any one of those out and the number on the page stops being something you can hand to a contractor, an insurer, or a buyer.
Step 5: How Long Does an Air Quality Inspection Take?
A typical home inspection takes about one to two hours on site, depending on the size of the property and how many areas we’re sampling. A small condo with one problem spot moves fast. A four-bedroom house with a finished basement, a crawlspace, and a mystery smell takes longer, and we’d rather be thorough than quick.
Lab turnaround is the part that varies. Standard mould analysis usually comes back within a couple of business days, and we offer same-day reporting on the on-site findings so you’re not sitting in silence wondering what we saw. You’ll leave the appointment already knowing our first read of the situation. The full lab-backed report follows once the numbers are in. If you’re mid-sale or dealing with a health concern and need results faster, tell us when you book and we’ll flag the lab for a rush.
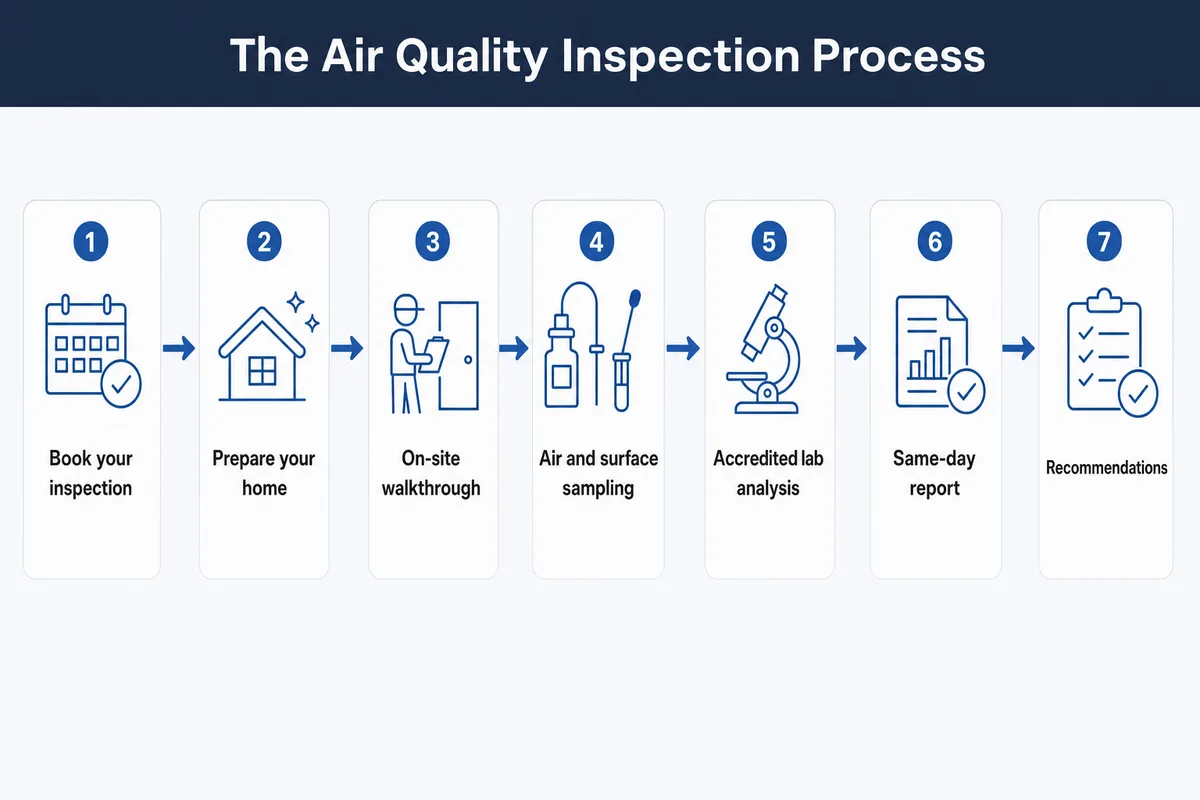
Step 6: What Do You Receive in the Report?
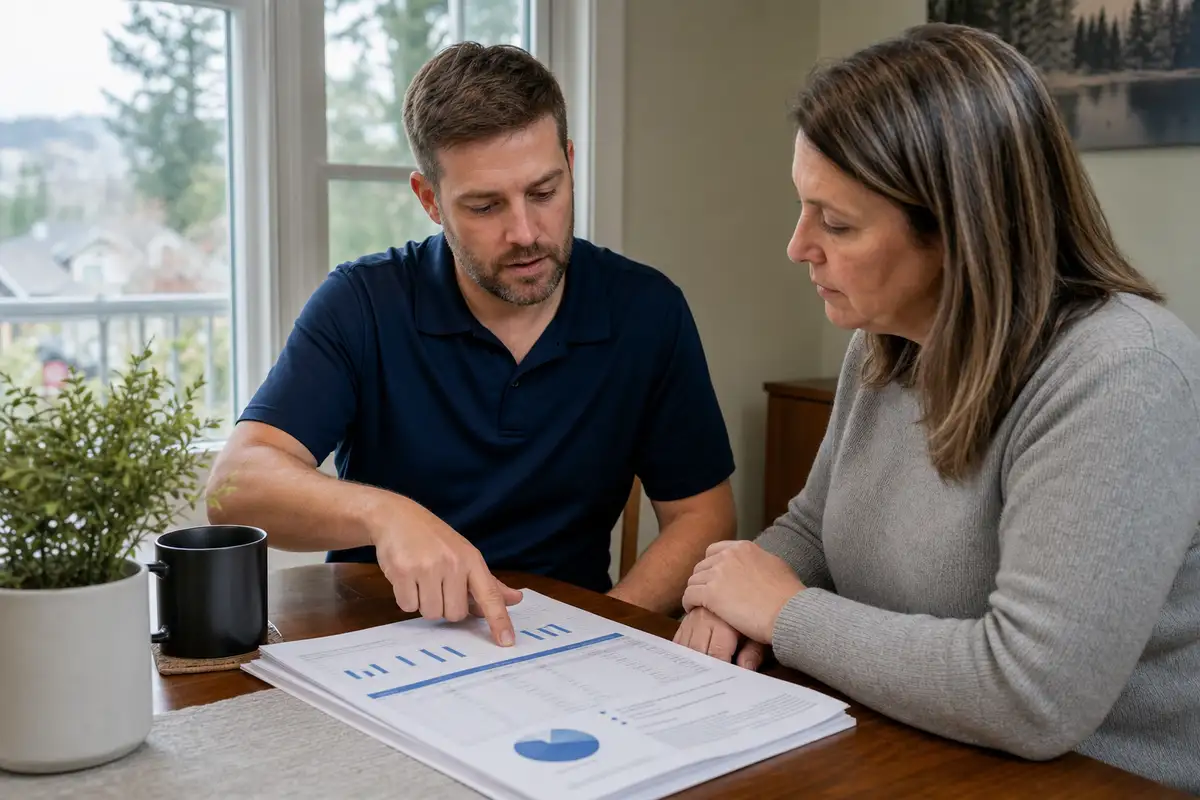
You get a written report that spells out what we found, what the lab confirmed, and what it means in plain language. Not a wall of raw numbers you’d need a chemistry degree to read. Each finding is laid out with the sample location, the result, how it compares to the outdoor control or the accepted range, and a clear note on whether it’s a concern. Here’s what’s inside:
- Photos from the walkthrough, tied to each area we assessed
- Moisture and humidity readings room by room
- Lab data for every air and surface sample, with the outdoor control
- Specific recommendations, ranked by priority
If you want help making sense of the figures, we walk you through how to read your air quality test results so nothing stays fuzzy. This is the document you can hand to a contractor, a landlord, a buyer, or an insurer, and it’ll hold up. That’s the point of paying for a professional test instead of a $30 kit from the hardware store.
Step 7: What Happens After the Inspection?
After the report, you decide what’s next, and we tell you honestly whether you even need to act. Plenty of inspections come back clean, and when they do, we say so. There’s no invented problem to sell you. When there is an issue, the report gives you a prioritized plan: fix the moisture source first, address the growth, then retest to confirm it worked.
If remediation is needed, we can point you toward qualified mold removal help and explain what proper cleanup should involve, so you know what you’re paying for and can spot a cut-corner job. Post-remediation verification, testing the same spot again after the work, is the step people skip and later regret. We’ll flag it when it matters. If you’re weighing whether the whole thing is worth it, our take on why indoor air quality testing pays off lays out the case without the scare tactics.
“In 15,000-plus inspections, the homes that stay healthy are the ones where we found the moisture source, not just the mould. Fix the leak and the air takes care of itself.”
Common Questions About the Inspection Process
💵 How much does an air quality inspection cost?
Pricing depends on the size of the property, how many samples the lab has to run, and whether you need testing for mould, asbestos, or both. We give you the number before we book, so there are no surprises. For a fuller breakdown of what drives the price, see our guide to air quality testing cost in Canada. The honest answer: a professional inspection costs far less than tearing out drywall on a guess.
🏠 Do I need to leave during the inspection?
No. You’re welcome to stay, and most people do. It’s actually useful, because you can point out exactly where you noticed the smell or the stain, and you’ll understand your report better if you watched us take the samples.
📦 Can’t I just use a home air quality test kit?
You can, and for a rough gut-check it’s fine. But a DIY kit won’t compare against an outdoor control, won’t inspect the building for the moisture source, and won’t produce a lab report anyone official will accept. It tells you something might be wrong. It won’t tell you what, where, or what to do about it.
📍 What areas do you serve?
We cover much of Ontario and Quebec, including Ottawa, Montreal, Gatineau, Kingston, Carleton Place, Brockville, Belleville, and Cornwall. You can find your nearest service area or check our full list of services to see what we offer near you.
A professional test pairs the right sampling method with an accredited lab and a same-day outdoor control, so your result is a real number a contractor, insurer, or buyer will accept. A DIY kit skips the outdoor comparison, skips the building inspection that finds the moisture source, and can’t tell you which species you’re dealing with. It flags that something might be off. It won’t tell you what, where, or what to do next.
Our inspectors are IICRC and IAQA certified, and we follow recognized industry consensus documents, including the IICRC S520 standard for mould assessment and established ASTM sampling methods for airborne and surface samples. Samples go to an accredited lab and are reported against an outdoor control taken the same day, which is what makes the numbers defensible rather than just indicative.
Ready to Book Your Inspection?
If something in your home has been nagging at you, waiting rarely makes it cheaper to fix. A moisture problem caught early is a small repair. The same problem found a year later, after it’s spread behind the walls, is a renovation. Our certified inspectors have run this exact process 15,000 times since 2005, and every one of them ends the same way: you know what’s in your air, and you know what to do next.
Monday to Friday, 8:00 AM to 3:00 PM.